


We work with a passion of taking challenges and creating new ones in the construction sector


| Factor | Details |
|---|---|
| Most Popular Roof Types | Hip roofs (75% choice), Gable roofs (versatile), Flat roofs (modern appeal) |
| Best Materials | Iron sheets (affordable), Clay tiles (premium), Concrete tiles (durable) |
| Cost Range | KSh 180,000 – 450,000 for complete roofing system |
| Pitch Requirements | 30-45 degrees for iron sheets, 22-30 degrees for tiles |
| Drainage Essentials | 6-inch gutters, proper slope calculation, downspouts every 12 meters |
| Modern Trends | Solar integration, green roofing, smart ventilation systems |
When I started designing roofs twenty years ago, most clients picked whatever looked nice. That approach cost them thousands in repairs later. Your roof isn’t just a hat for your house – it’s the primary defense against Kenya’s unpredictable weather patterns. Roofing Design for 3 Bedroom House

Three bedroom houses typically span 120-180 square meters, which creates specific structural requirements. The roof must handle wind loads from our seasonal storms and support its own weight plus potential solar panels. I’ve seen too many homeowners choose beautiful designs that buckle under the first heavy rainfall because they ignored load calculations. Roofing Design for 3 Bedroom House
Your roof design affects everything inside your home. Poor ventilation creates condensation problems that damage walls and furniture. Inadequate insulation makes rooms unbearably hot during dry seasons and increases electricity bills dramatically. Roofing Design for 3 Bedroom House
Most contemporary house designs now incorporate multiple roof elements – not just one simple shape. This complexity requires careful planning to prevent water infiltration at joints and transitions. Roofing Design for 3 Bedroom House
Hip roofs dominate Kenyan residential construction for good reasons. They shed water efficiently in all directions and resist wind uplift better than other designs. I recommend hip roofs for exposed locations where strong winds are common.

Gable roofs offer the most interior space and cost less to construct. They’re perfect if you want to add a ceiling or create storage areas. The triangular shape provides excellent water runoff, though you’ll need proper bracing for wind resistance. Roofing Design for 3 Bedroom House
Flat roof houses are gaining popularity among younger homeowners. They provide space for rooftop gardens, solar installations, and outdoor entertainment areas. However, flat roofs require more maintenance and premium waterproofing materials. Roofing Design for 3 Bedroom House
Combination roofs mix different styles – perhaps a hip roof over the main living area with gable sections over bedrooms. This approach creates visual interest while optimizing function for different spaces. The key is ensuring all sections drain properly without creating water traps. Roofing Design for 3 Bedroom House
Iron sheets remain the most practical choice for most Kenyan homes. Gauge 28 or 30 provides adequate durability while keeping costs reasonable. I always specify pre-painted sheets rather than plain galvanized – the color coating extends lifespan significantly and looks better longer. Roofing Design for 3 Bedroom House
Clay tiles offer superior insulation and last 50+ years with minimal maintenance. They’re heavier than iron sheets, requiring stronger roof structures, but the initial investment pays off through reduced cooling costs and virtually no replacement needs. Roofing Design for 3 Bedroom House

Concrete tiles provide a middle ground between iron sheets and clay tiles. They’re more affordable than clay but offer similar longevity and insulation properties. The variety of colors and profiles available makes them popular for upscale developments. Roofing Design for 3 Bedroom House
Stone-coated steel sheets combine iron sheet affordability with tile aesthetics. They’re lighter than concrete tiles but provide better insulation than plain iron sheets. I recommend them for homeowners who want a premium look without the structural requirements of heavy tiles. Roofing Design for 3 Bedroom House
Your roof structure must support dead loads (the roof materials themselves) plus live loads (wind, temporary workers, maintenance equipment). For iron sheet roofing, calculate 35-45 kg per square meter total load. Tile roofs require structures designed for 80-120 kg per square meter. Roofing Design for 3 Bedroom House
Rafter spacing depends on your chosen materials and local wind conditions. Iron sheets typically need rafters every 600mm, while heavy tiles may require 400mm spacing. I always err on the conservative side – the cost difference is minimal but the safety margin is crucial. Roofing Design for 3 Bedroom House

Foundation walls must be strong enough to handle roof loads plus any uplift forces from wind. This is especially critical for low budget modern 3-bedroom house designs where owners might be tempted to reduce structural elements to save money. Roofing Design for 3 Bedroom House
Professional engineering calculations become essential for complex roof shapes or challenging sites. The small additional cost for proper engineering prevents expensive remedial work later and ensures your insurance coverage remains valid. Roofing Design for 3 Bedroom House
Kenya’s rainfall patterns create unique drainage challenges. We get months of dry weather followed by intense downpours that overwhelm inadequate guttering systems. Your gutters must handle peak rainfall, not average conditions. Roofing Design for 3 Bedroom House
Six-inch gutters are minimum for most 3-bedroom houses. Smaller gutters overflow during heavy rains, causing water damage to walls and foundations. I’ve replaced countless 4-inch gutter systems that failed during their first rainy season. Roofing Design for 3 Bedroom House

Downspout placement requires careful calculation. Install one downspout for every 12 meters of gutter length maximum. Position them at low points to ensure complete drainage and size them to match gutter capacity. Roofing Design for 3 Bedroom House
Proper slope is critical – gutters must fall 10-15mm per meter toward downspouts. Too little slope causes standing water and mosquito breeding. Too much slope creates turbulence that reduces drainage capacity during heavy rains. Roofing Design for 3 Bedroom House
Underground drainage connections prevent soil erosion around your foundation. Simple splash blocks aren’t sufficient for our intense rainfall patterns. Connect downspouts to proper drainage systems that carry water well away from the house structure. Roofing Design for 3 Bedroom House
Solar panel integration requires planning from the design stage. Your roof structure must handle additional loads and provide optimal orientation for energy generation. South-facing slopes with 30-degree pitches maximize solar efficiency in Kenya’s location. Roofing Design for 3 Bedroom House
Green roofing systems are becoming popular for flat roof houses. They provide insulation, reduce urban heat effects, and create usable outdoor space. However, they require specialized waterproofing and drainage systems plus ongoing maintenance. Roofing Design for 3 Bedroom House

Smart ventilation systems automatically adjust based on temperature and humidity. Ridge vents combined with soffit vents create natural airflow that reduces cooling costs and prevents moisture problems. Active ventilation fans can supplement natural systems in challenging locations. Roofing Design for 3 Bedroom House
Insulation options have expanded beyond traditional materials. Reflective barrier systems reduce heat transfer more effectively than bulk insulation alone. Combined systems using both approaches provide optimal comfort and energy efficiency. Roofing Design for 3 Bedroom House
Basic iron sheet roofing for a 140-square-meter house costs KSh 180,000-220,000 including materials and installation. This covers gauge 30 iron sheets, timber structure, and basic guttering. Quality varies significantly among contractors, so don’t base decisions solely on price. Roofing Design for 3 Bedroom House
Premium tile roofing ranges from KSh 350,000-450,000 for the same house size. The higher initial cost is offset by longer lifespan and reduced cooling expenses. Factor in the stronger structure required for tile installations when calculating total project costs. Roofing Design for 3 Bedroom House

Labor costs vary by location and contractor experience. Urban areas command 20-30% higher rates than rural locations, but access to materials and skilled workers is often better. Budget 40-50% of total roofing costs for labor and installation. Roofing Design for 3 Bedroom House
Hidden costs include structural reinforcement for heavy materials, electrical work for solar integration, and upgraded guttering systems. Add 15-20% contingency to your initial budget for unexpected requirements discovered during construction. Roofing Design for 3 Bedroom House
Roofing work involves significant safety risks and technical complexity. Professional installers carry insurance coverage and guarantee their work. DIY installation might save money initially but often creates problems that cost more to fix than professional installation would have cost. Roofing Design for 3 Bedroom House
Proper installation requires specialized tools and experience with local weather challenges. Poorly installed roofing fails prematurely and can cause extensive water damage to your home’s structure and contents. Roofing Design for 3 Bedroom House

Quality contractors provide warranties on both materials and workmanship. They understand local building codes and inspection requirements. Their experience prevents costly mistakes that inexperienced installers commonly make. Roofing Design for 3 Bedroom House
KNH Contractors offers comprehensive roofing services with proven track records on hundreds of residential projects. Their team understands Kenya’s unique construction challenges and provides solutions that last. Roofing Design for 3 Bedroom House
What’s the best roof pitch for a 3-bedroom house in Kenya? Iron sheet roofs need 30-45 degree pitches for proper water runoff. Tile roofs can work with 22-30 degree pitches. Steeper pitches shed water faster but increase wind resistance and construction costs. Roofing Design for 3 Bedroom House
How long do different roofing materials last in Kenya’s climate? Iron sheets last 15-25 years depending on gauge and coating quality. Clay and concrete tiles last 50+ years with minimal maintenance. Stone-coated steel provides 30-40 year lifespan. Roofing Design for 3 Bedroom House
Should I include gutters in my initial roofing budget? Yes, gutters are essential for protecting your foundation and walls. Budget KSh 45,000-65,000 for proper guttering systems on a 3-bedroom house. Roofing Design for 3 Bedroom House
Can I add solar panels to any roof type? Most roof types can accommodate solar panels with proper mounting systems. Flat roofs offer the most flexibility for optimal panel positioning. Roofing Design for 3 Bedroom House
What maintenance does each roof type require? Iron sheets need annual inspections and periodic repainting. Tile roofs require occasional tile replacement and gutter cleaning. All roofs benefit from professional inspections every 2-3 years. Roofing Design for 3 Bedroom House
How do I choose between hip and gable roof designs? Hip roofs offer better wind resistance and water shedding. Gable roofs provide more interior space and cost less initially. Consider your location’s weather patterns and aesthetic preferences. Roofing Design for 3 Bedroom House
Is it worth investing in premium roofing materials for a 3-bedroom house? Premium materials offer better longevity and energy efficiency. Calculate total lifecycle costs including maintenance and replacement when comparing options. Quality materials often provide better value over 20+ year periods.

| Cost Component | Price Range (KES) | Notes |
|---|---|---|
| Hydrogeological Survey | 50,000 – 80,000 | Essential first step |
| Drilling per meter | 6,000 – 9,000 | Varies by geology |
| Casing per meter | 3,000 – 5,000 | Steel or PVC options |
| Mobilization | 30,000 – 70,000 | Transport equipment to site |
| Test pumping & analysis | 15,000 – 30,000 | Check water quality |
| Pump installation | 100,000 – 500,000 | Manual, electric, or solar |
| Total project cost | 1M – 3M | Complete functional borehole |
How much does it cost to drill a borehole in Kenya? This question keeps many property owners awake at night, especially with rising water bills and unreliable municipal supply. The truth is – borehole costs vary dramatically based on your location, soil type, and depth requirements. But don’t worry, I’ll break down every expense so you can budget properly.

Cost of Drilling a Borehole in Kenya
The cost of drilling a borehole in Kenya depends heavily on where you live. Nairobi and Central Kenya generally cost more due to rocky geology that requires specialized equipment. Coastal areas face challenges with saltwater intrusion, while arid regions need deeper drilling to reach water tables. Cost of Drilling a Borehole in Kenya
Regional cost variations:
Why these differences? Rocky areas require hammer drilling rigs that work slower and use more fuel. Sandy soils allow faster progress with rotary rigs. I’ve seen projects in Kiambu take twice as long as similar depths in Machakos simply because of underground granite formations. Cost of Drilling a Borehole in Kenya
Transport costs also vary significantly. Drilling rigs in remote areas face expensive mobilization costs that can add KES 50,000-100,000 to your total bill. Urban areas benefit from shorter transport distances and better road access. Professional borehole drilling companies factor these logistics into their pricing structures. Cost of Drilling a Borehole in Kenya

Cost of Drilling a Borehole in Kenya
Before any drilling begins, you need a hydrogeological survey – this isn’t optional if you want to avoid drilling a dry hole. Licensed geologists use resistivity surveys and geological mapping to identify the best drilling spots. This survey costs KES 50,000-80,000 but can save you hundreds of thousands later. Cost of Drilling a Borehole in Kenya
Permit costs add up quickly but are legally required. The Water Resources Authority (WRA) charges fees based on your intended water use. Domestic boreholes cost less than commercial or irrigation permits. NEMA environmental assessments may also be required for larger projects.Cost of Drilling a Borehole in Kenya
Essential pre-drilling expenses:
Site preparation costs often get overlooked in initial budgets. Your drilling contractor needs level ground and vehicle access to position their rig. Tree removal, ground leveling, or road improvements can add KES 20,000-50,000 to your project. Getting the best borehole drilling services includes proper site assessment and preparation planning. Cost of Drilling a Borehole in Kenya
The survey report guides drilling depth estimates, which directly impacts your final costs. A good survey prevents costly mistakes like drilling through hard rock when softer formations exist nearby. I’ve seen homeowners save over KES 300,000 by moving their drilling location just 50 meters based on survey recommendations. Cost of Drilling a Borehole in Kenya

The actual drilling represents the largest single expense in most borehole projects. Drilling rigs charge per meter, but rates vary based on geology, rig type, and contractor experience. Rotary rigs work faster in soft soils, while percussion or hammer rigs handle rocky conditions better but cost more to operate. Cost of Drilling a Borehole in Kenya
Depth requirements directly impact your drilling bill. Most successful boreholes in Kenya range from 80-200 meters deep, depending on local water tables. Shallow boreholes (50-80 meters) might provide adequate water in some areas, while others require depths exceeding 250 meters. Cost of Drilling a Borehole in Kenya
Drilling cost factors:
Drilling contractors typically quote per-meter rates that include equipment operation, crew wages, and basic materials. However, difficult geology can slow progress and increase costs beyond initial estimates. Comprehensive borehole drilling services provide detailed cost estimates before work begins. Cost of Drilling a Borehole in Kenya
Fuel costs significantly impact drilling expenses. Diesel-powered rigs consume 200-400 liters daily depending on size and geology. When fuel prices spike, drilling costs increase accordingly. Some contractors adjust their rates monthly based on fuel price fluctuations. Cost of Drilling a Borehole in Kenya

Borehole casing prevents collapse and contamination – you can’t skip this step. Casing costs depend on material choice (PVC or steel), diameter, and depth. Most residential boreholes use 6-inch diameter casing, while agricultural applications may require 8-inch or larger sizes. Cost of Drilling a Borehole in Kenya
PVC casing costs less upfront but may not last as long as steel in certain conditions. Steel or plastic casing material depends on your soil chemistry and budget constraints. Steel resists corrosion better in acidic soils but costs 40-60% more than PVC alternatives. Cost of Drilling a Borehole in Kenya
Casing cost breakdown:
Gravel packing around the casing improves water flow and prevents sand infiltration. This process uses specially sized gravel that costs KES 200-400 per meter of cased hole. The gravel acts as a filter, allowing clean water to enter while blocking fine particles that could clog your pump. Cost of Drilling a Borehole in Kenya
Well development flushes fine particles from around the casing and improves water yield. This process uses compressed air or high-pressure water to clean the formation. Development costs KES 15,000-25,000 but can double your borehole’s water production capacity.

Water quality testing ensures your borehole produces safe, usable water. Laboratory analysis costs KES 8,000-15,000 for basic parameters like pH, bacteria, and dissolved solids. Extended testing for pesticides or heavy metals adds KES 10,000-20,000 to your bill but may be necessary in agricultural or industrial areas. Cost of Drilling a Borehole in Kenya
Pump selection dramatically affects your total investment. Manual hand pumps cost KES 15,000-30,000 but require physical effort to operate. Electric submersible pumps range from KES 80,000-200,000 depending on capacity and quality. Solar pumping systems cost KES 150,000-500,000 but eliminate ongoing electricity expenses. Cost of Drilling a Borehole in Kenya
Pump system costs:
Solar pumping systems make financial sense in areas with unreliable electricity or high power costs. The initial investment is higher, but operating costs are minimal after installation. I’ve calculated that solar pumps pay for themselves within 3-5 years in most Kenyan locations through eliminated electricity bills. Cost of Drilling a Borehole in Kenya
Pump installation requires skilled technicians who understand submersible systems and electrical connections. Poor installation voids warranties and can damage expensive equipment. Professional borehole services include proper pump installation and system commissioning.

Many borehole projects exceed initial budgets due to unforeseen circumstances. Difficult geology can require specialized drilling techniques that cost more per meter. Equipment breakdowns cause delays that increase mobilization costs. Poor planning leads to additional expenses that could have been avoided. Cost of Drilling a Borehole in Kenya
Site access problems create unexpected costs. Narrow roads may require smaller rigs that work slower and cost more per meter. Remote locations need temporary accommodation for drilling crews. Rocky terrain might need blasting, which requires special permits and explosive materials. Cost of Drilling a Borehole in Kenya
Common unexpected expenses:
Dry holes represent the worst-case scenario financially. Even with proper surveys, some boreholes fail to produce adequate water. You still pay for drilling, casing, and mobilization costs even if no water is found. This is why avoiding shortcuts in borehole drilling and working with experienced contractors is so important. Cost of Drilling a Borehole in Kenya
Seasonal factors affect drilling costs and scheduling. The dry season creates high demand for drilling services, which can increase prices by 10-20%. Rainy seasons make site access difficult but may offer better pricing. Planning your project timing can save significant money. Cost of Drilling a Borehole in Kenya
Storage and distribution systems add costs beyond the borehole itself. Water tanks, piping, and pressure systems can cost KES 100,000-300,000 depending on your needs. These components are essential for a functional water supply system but often get overlooked in initial budgeting.

Most drilling contractors require payment in stages rather than upfront lump sums. Typical payment structures include 30% deposit, 40% at drilling completion, and 30% after pump installation and testing. This protects both parties and ensures work quality before final payment. Cost of Drilling a Borehole in Kenya
Bank loans specifically for water projects are available from some financial institutions. Development banks and microfinance organizations may offer favorable terms for borehole installations. Loan terms typically range from 2-5 years with interest rates varying based on your creditworthiness. Cost of Drilling a Borehole in Kenya
Financing options available:
Group financing works well in residential estates where multiple homeowners need boreholes. Sharing mobilization costs and negotiating bulk pricing can reduce per-household expenses by 15-25%. Coordinated drilling also minimizes disruption to the neighborhood. Cost of Drilling a Borehole in Kenya
Some contractors offer equipment lease arrangements where you pay monthly fees for pump systems rather than large upfront costs. This approach spreads expenses over time but typically costs more in total. However, it includes maintenance and replacement services that provide peace of mind. Cost of Drilling a Borehole in Kenya
KNH Contractors offers flexible payment arrangements that work within most budgets. They understand that borehole projects represent significant investments for families and businesses, so they structure payments to minimize financial strain while ensuring project completion. Cost of Drilling a Borehole in Kenya

Borehole maintenance costs are often underestimated when calculating total ownership expenses. Annual maintenance should include pump servicing, water quality testing, and system inspections. These services typically cost KES 25,000-50,000 yearly but prevent expensive repairs and extend equipment life. Cost of Drilling a Borehole in Kenya
Pump replacement represents the largest long-term expense. Electric submersible pumps last 7-12 years with proper maintenance, while solar pumps may last 15-20 years. Replacement costs range from KES 80,000-200,000 depending on capacity and technology upgrades available at replacement time. Cost of Drilling a Borehole in Kenya
Annual maintenance costs:
Return on investment calculations depend on your alternative water costs. Municipal water bills, water truck purchases, and time spent collecting water all factor into ROI calculations. Most residential boreholes pay for themselves within 5-8 years through eliminated water purchase costs. Cost of Drilling a Borehole in Kenya
Commercial and agricultural applications often show faster payback periods. Hotels, schools, and farms with high water consumption can recover borehole costs within 2-4 years. The reliability factor also has value – consistent water supply prevents business disruptions that cost money. Cost of Drilling a Borehole in Kenya
Property value increases provide additional ROI benefits. Homes with reliable water supplies sell for 10-15% more than similar properties without boreholes. This appreciation partially offsets installation costs even if you never sell your property. Cost of Drilling a Borehole in Kenya

How much does it cost to drill a 100-meter borehole in Kenya? A 100-meter borehole typically costs KES 1.2-1.8 million including drilling, casing, pump installation, and testing. Costs vary based on geology, location, and equipment choices.
Do I need permits to drill a borehole on my property? Yes, you need permits from the Water Resources Authority (WRA) and your county government. Some projects also require NEMA environmental clearance. Total permit costs range from KES 25,000-70,000.
What happens if my borehole doesn’t produce water? You still pay for drilling and mobilization costs even if no water is found. A proper hydrogeological survey reduces this risk significantly but cannot eliminate it entirely.
How long does borehole drilling take? Most residential boreholes take 3-7 days to complete, depending on depth and geology. This includes drilling, casing installation, development, and pump installation.
Is solar pumping worth the extra cost? Solar pumps cost more upfront but eliminate ongoing electricity expenses. They typically pay for themselves within 3-5 years through eliminated power bills and provide reliable water even during power outages.
How often does my borehole need maintenance? Annual maintenance including pump servicing and water testing costs KES 25,000-50,000. This prevents expensive repairs and ensures continued water quality and system reliability.
Can I drill my borehole gradually to spread costs? No, boreholes must be completed in one continuous operation. However, you can phase pump installation and distribution systems if budget constraints require staged implementation.
What’s the deepest borehole needed in Kenya? Most successful boreholes range from 80-250 meters deep. Extremely deep boreholes (300+ meters) are rarely cost-effective for residential use due to exponentially increasing drilling costs.

| Element | Details |
|---|---|
| Cost Advantage | 20-30% cheaper than pitched roofs |
| Maintenance | Annual waterproofing checks essential |
| Drainage | Proper slope (1:40 minimum) prevents water pooling |
| Materials | Concrete slab with waterproof membrane |
| Best Climate | Works well in areas with moderate rainfall |
| Design Style | Perfect for modern, minimalist aesthetics |
| Space Usage | Can accommodate rooftop gardens or solar panels |
Why do some houses look so clean and modern while others seem stuck in the past? The answer often lies in the flat roof house design. Flat roof houses create that sleek, contemporary appearance that many homeowners crave. But there’s more to flat roofs than just looks – they offer practical benefits that make sense for modern living.

flat roof house design
Flat roofs aren’t actually completely flat – they have a slight slope for drainage purposes. This subtle angle, usually around 1:40, allows rainwater to flow toward gutters and downspouts. Traditional pitched roofs shed water quickly through their steep angles, but flat roofs handle drainage more gradually.
flat roof house design
The construction process differs significantly too. Where pitched roofs use rafters, trusses, and multiple layers of materials, flat roofs typically employ a concrete slab as the base structure. This concrete gets covered with insulation and waterproofing materials. The result? A roof that doubles as usable space for various purposes.
Most people think flat roofs are new, but they’ve been around for centuries in hot, dry climates. What’s changed is the technology – modern waterproofing materials and proper drainage systems have made flat roofs viable in areas with more rainfall. I’ve seen families transform their flat rooftops into garden spaces, entertainment areas, and even additional storage zones.
The structural requirements are different too. Flat roofs need stronger support beams since they carry more load per square foot than angled roofs. This might seem like a disadvantage, but it actually creates opportunities for more open interior spaces without support columns interrupting room layouts.
flat roof house design
Cost savings represent the biggest advantage of flat roof design. You’ll spend 20-30% less on materials and labor compared to pitched roof construction. The reduced surface area means fewer materials, and the simpler construction process requires less specialized labor. For budget-conscious builders, this difference can free up thousands of shillings for other home improvements.
Key financial and practical advantages:
Space efficiency is another major benefit. Your flat roof can accommodate solar panels more effectively than pitched surfaces. The consistent angle and unobstructed surface area maximize solar energy collection. I’ve worked with homeowners who installed both solar panels and small garden areas on the same roof – something impossible with traditional pitched designs.
Access for maintenance is incredibly simple with flat roofs. You can walk across the surface safely to clean gutters, inspect waterproofing, or service HVAC equipment. No more dangerous ladder work or expensive professional inspections. This accessibility translates to lower long-term maintenance costs and better care for your investment.

flat roof house design
Today’s flat roof construction relies on advanced materials that solve the water problems that plagued older designs. The foundation starts with a reinforced concrete slab, typically 6-8 inches thick for residential applications. This creates a solid, stable platform that can support additional loads like rooftop gardens or equipment.
Waterproofing technology has revolutionized flat roof performance. Modified bitumen membranes, EPDM rubber, and liquid applied coatings provide superior protection against water infiltration. These materials last 15-25 years with proper maintenance – much longer than the tar and gravel systems used decades ago.
Modern flat roof layer system:
Insulation placement is crucial in flat roof design. The insulation goes above the structural deck, keeping the concrete warm and preventing thermal bridging. This “warm roof” design prevents condensation issues and improves energy efficiency significantly. Contemporary house designs often incorporate these advanced insulation techniques.
Drainage systems have become much more sophisticated too. Internal drains, scuppers, and overflow systems ensure water never pools on the roof surface. Proper drainage design prevents the vast majority of flat roof problems, making them as reliable as any pitched roof system.

flat roof house design
Small homes benefit tremendously from flat roof design because every square foot counts. A compact 2-3 bedroom house with a flat roof can incorporate rooftop storage or a small garden area that effectively expands the living space. The clean lines also make small houses appear larger than they actually are.
For medium-sized family homes, flat roofs open up interesting possibilities. 4-bedroom house designs with flat roofs can include rooftop entertainment areas, solar panel arrays, or even small swimming pools. The structural strength of proper flat roof construction can support these additional features.
Design ideas by house size:
Large luxury homes can really showcase flat roof potential. Multiple roof levels create visual interest while providing different functional zones. One level might house mechanical equipment, another supports a garden, and a third provides entertainment space. This zoning approach maximizes the flat roof’s versatility.
The key to successful flat roof design is understanding load requirements early in the planning process. Different activities require different structural support levels. A simple garden needs less reinforcement than a swimming pool or heavy equipment installation. Professional contractors can calculate these loads accurately during the design phase.
flat roof house design
Water management makes or breaks flat roof performance. The primary drainage system should handle normal rainfall, while secondary systems manage heavy downpours. This redundant approach prevents water backup that could damage the roof or building interior.
Slope design is critical even though the roof appears flat. A minimum 1:40 slope directs water toward drains or gutters. Steeper slopes (up to 1:20) work better in high rainfall areas but may affect the roof’s usability for other purposes. The slope must be consistent – no low spots where water can collect.
Essential drainage components:
Waterproof membrane selection depends on budget, climate, and intended roof use. EPDM rubber membranes last longest and resist punctures well. Modified bitumen systems cost less but require more maintenance. Liquid-applied coatings work well for complex roof shapes but need professional installation.
Regular maintenance keeps drainage systems working properly. Debris removal, drain cleaning, and membrane inspection should happen at least twice yearly. Most flat roof problems develop gradually – catching them early prevents expensive repairs later. I always tell clients that preventive maintenance costs far less than emergency repairs.

flat roof house design
Flat roofs offer exceptional opportunities for energy efficiency improvements. The large, unobstructed surface area accommodates more solar panels than pitched roofs of similar homes. Panel installation is simpler too – no need for specialized mounting systems that work with roof angles and shingle patterns.
Green roof systems turn flat roofs into living insulation layers. Plants and growing medium provide natural cooling through evapotranspiration while absorbing rainwater runoff. A well-designed green roof can reduce cooling costs by 30-50% during hot months. However, green roofs require stronger structural support and more complex waterproofing systems.
Energy efficiency features for flat roofs:
Cool roof technology uses reflective materials to bounce solar heat away from the building. White or light-colored roof surfaces can stay 50-60 degrees cooler than dark surfaces. This temperature difference translates directly into lower air conditioning costs and improved indoor comfort.
Rainwater harvesting works exceptionally well with flat roofs. The large collection area and controlled drainage systems make it easy to direct water into storage tanks. KNH Contractors often incorporates rainwater collection systems into flat roof designs, helping families reduce their water bills and environmental impact.

flat roof house design
Water pooling represents the most serious flat roof problem. Poor drainage design or clogged drains allow water to accumulate, leading to membrane deterioration and potential leaks. Prevention requires proper slope design, adequate drainage capacity, and regular maintenance to keep drains clear.
Membrane damage can occur from foot traffic, falling debris, or thermal expansion and contraction. High-quality membranes resist most damage, but even small punctures can cause significant problems if left unrepaired. Regular inspections help identify damage before it becomes costly.
Most common flat roof issues:
Flashing details around roof edges, drains, and penetrations require careful attention during construction. These transition areas experience the most stress and are most likely to develop leaks. Quality materials and skilled installation prevent most flashing problems, but they still need periodic inspection and maintenance.
Thermal movement affects all flat roof materials. Daily temperature changes cause expansion and contraction that can stress membranes and flashing details. Proper design accommodates this movement through expansion joints and flexible materials. Ignoring thermal effects leads to premature failure and expensive repairs.
Professional installation makes the biggest difference in flat roof performance. Experienced contractors understand the critical details that prevent problems. They also provide warranties and maintenance services that protect your investment over time.
flat roof house design
Initial construction costs favor flat roofs by significant margins. Material costs run 20-30% lower because flat roofs require less surface area to cover the same floor space. Labor costs are also reduced – flat roof construction is more straightforward than complex pitched roof framing and shingle installation.
Long-term maintenance costs require careful consideration. Flat roofs need more frequent waterproofing maintenance, but this work is easier and safer to perform. Pitched roofs last longer between major maintenance cycles, but repairs are more expensive and dangerous to execute. Over a 20-year period, total costs are usually similar.
Cost comparison breakdown:
| Factor | Flat Roof | Pitched Roof |
|---|---|---|
| Initial materials | 25-30% less | Higher |
| Labor costs | 20-25% less | Higher |
| Maintenance frequency | Every 3-5 years | Every 5-10 years |
| Maintenance cost per visit | Lower | Higher |
| Energy savings potential | High (solar, insulation) | Moderate |
Energy savings can offset higher maintenance costs over time. Solar panel installations pay for themselves faster on flat roofs due to optimal positioning and easier installation. Enhanced insulation opportunities also reduce heating and cooling costs significantly.
Insurance considerations vary by location and insurance company. Some insurers charge slightly higher premiums for flat roofs due to perceived water damage risks. However, modern flat roof systems with proper maintenance have similar risk profiles to pitched roofs. Shopping for insurance quotes helps find companies that understand quality flat roof construction.
The value equation becomes even more favorable when you consider the additional usable space flat roofs provide. Rooftop gardens, entertainment areas, and solar installations add value that pitched roofs can’t match. For many homeowners, these benefits justify any additional maintenance requirements.
flat roof house design
How long do flat roofs last compared to pitched roofs?
Modern flat roofs last 15-25 years with proper maintenance, while pitched roofs typically last 20-30 years. However, flat roof repairs are easier and less expensive to perform, making their lifecycle costs competitive with pitched alternatives.
Can flat roofs handle heavy rainfall?
Yes, when properly designed with adequate drainage systems. The key is having sufficient drain capacity and proper slope to prevent water pooling. Modern flat roofs perform well in all climate conditions with appropriate design modifications.
Are flat roofs more prone to leaking?
Not with modern construction methods and materials. Quality flat roofs have similar leak rates to pitched roofs. Most flat roof problems stem from poor installation or deferred maintenance rather than inherent design flaws.
Can I walk on my flat roof?
Most residential flat roofs can support foot traffic for maintenance purposes, but regular walking isn’t recommended without protective walkways. Commercial-grade flat roofs can accommodate more traffic with proper design and materials.
Do flat roofs cost more to insure?
Insurance costs vary by company and location. Some insurers charge slightly higher premiums, while others treat flat and pitched roofs equally. Shopping with multiple companies helps find the best rates for quality flat roof construction.
What’s the best waterproofing system for flat roofs?
EPDM rubber membranes offer the best longevity and puncture resistance for most residential applications. Modified bitumen systems cost less but require more maintenance. The choice depends on budget, climate, and intended roof use.
Can I install solar panels on my flat roof?
Flat roofs are ideal for solar installations. Panels can be positioned at optimal angles and installed more easily than on pitched surfaces. The weight capacity of the roof structure determines how many panels it can support.
How much slope should a flat roof have?
A minimum slope of 1:40 (1/4 inch per foot) is required for proper drainage. Steeper slopes up to 1:20 work better in high rainfall areas but may limit other roof uses. The slope should be consistent across the entire roof surface.

| Aspect | Details |
|---|---|
| Budget Range | Ksh 1.5M – 3.5M for complete construction |
| Floor Area | 120-180 square meters optimal for 3 bedrooms |
| Best Materials | Concrete blocks, iron sheets, timber frames |
| Design Style | Modern minimalist with flat roof or simple pitched roof |
| Cost-Saving Features | Open floor plans, standard windows, local materials |
| Construction Time | 2-3 months with proper planning |
Building a modern 3 bedroom house doesn’t have to drain your savings account. Many families in Kenya want stylish homes but face budget constraints that seem impossible to overcome. The good news? Smart design choices and careful material selection can give you that contemporary look without the hefty price tag.
low budget modern 3 bedroom house design
Modern design focuses on simplicity and functionality – two things that actually save money when done right. The key lies in maximizing space efficiency while minimizing unnecessary decorative elements that inflate costs. Clean lines, large windows, and open spaces create that contemporary feel without expensive finishes.
What makes a design “modern” on a budget:
The beauty of low budget modern houses is their focus on function over fancy details. You’re not paying for complex architectural elements – instead, you get practical spaces that work well for everyday living. This approach has helped thousands of Kenyan families build homes they can actually afford.
low budget modern 3 bedroom house design
A well-planned 3 bedroom house needs smart space allocation to work within budget limits. The master bedroom should be around 12×14 feet, while the other two bedrooms can be 10×12 feet each. This sizing uses standard materials efficiently and reduces waste.
Optimal room arrangement for cost savings:
The trick is creating flow between spaces without wasting square footage on long corridors. An experienced contractor told me that well-designed 3 bedroom houses feel larger than poorly planned 4 bedroom homes. When you eliminate unnecessary walls and create multipurpose areas, even 140 square meters can feel spacious.
KNH Contractors specializes in maximizing space efficiency while keeping costs reasonable. Their designs prove that budget limitations don’t mean cramped living spaces.

low budget modern 3 bedroom house design
Material choices make the biggest difference in your final budget. Concrete blocks cost less than stones and provide excellent insulation. Iron sheets work better than tiles for roofing when you’re watching expenses. Local timber costs a fraction of imported hardwood but still looks great with proper treatment.
low budget modern 3 bedroom house design
| Component | Budget Option | Cost Savings |
|---|---|---|
| Foundation | Machine cut stones | 30% less than dressed stones |
| Walls | Concrete blocks | 25% less than natural stones |
| Roofing | Gauge 30 iron sheets | 40% less than tiles |
| Windows | Aluminum frames | 35% less than hardwood |
| Flooring | Concrete screed + paint | 50% less than tiles |
I’ve seen families save over Ksh 800,000 just by choosing concrete blocks instead of natural stones for their walls. The finish looks almost identical once you apply the right plaster and paint. Smart contractors know these tricks and can guide you toward materials that deliver great results without premium prices.

low budget modern 3 bedroom house design
Open floor plans save money and create modern appeal at the same time. When you combine the living room, dining area, and kitchen into one flowing space, you eliminate walls and reduce construction costs. This approach also makes your home feel much larger than its actual square footage.
Space-saving design strategies:
The best 3 bedroom designs I’ve encountered use every corner effectively. Under-stair storage, built-in wardrobes, and multipurpose rooms add value without adding construction costs. One family I know turned their entrance area into a small office space – no extra room needed, but they gained functional workspace.
Modern families need flexible spaces that adapt to different activities. Your dining area might serve as homework space during the day and entertainment center in the evening. This flexibility costs nothing extra but adds tremendous value to daily living.

low budget modern 3 bedroom house design
Contemporary house exteriors rely on proportion and clean lines rather than expensive decorative elements. A simple flat roof with proper drainage costs less than complex pitched roofs but delivers that modern aesthetic you want. Large windows positioned strategically create visual interest without added expense.
Budget-friendly exterior features:
The secret to modern exteriors is restraint. Instead of trying to add every decorative element you see in magazines, focus on getting proportions right and maintaining clean lines. A well-proportioned simple house looks more expensive than a poorly designed complex one.
Paint choice makes a huge difference in final appearance. White or light gray exteriors with one accent wall create modern appeal using standard paint colors. Dark trim around windows and doors adds definition without requiring expensive materials. These simple touches transform basic construction into contemporary design.

low budget modern 3 bedroom house design
Modern interiors emphasize space, light, and simplicity – all things that cost less money than traditional decorative approaches. Light colors make rooms feel larger, open shelving costs less than closed cabinets, and simple furniture arrangements create contemporary appeal without expensive pieces.
Cost-effective modern interior elements:
I always advise clients to invest in good lighting rather than expensive finishes. Proper lighting makes even basic materials look premium. A few well-placed LED fixtures cost much less than fancy floor tiles but have bigger impact on how your home feels.
Modern doesn’t mean empty or cold. Natural textures like wood accents, woven baskets, and plants add warmth without major expense. The key is choosing a few quality pieces rather than filling every space with decorative items. This approach saves money and creates that clean, uncluttered look that defines contemporary design.

low budget modern 3 bedroom house design
Understanding where your money goes helps you make smart decisions throughout construction. Foundation and structural work typically consume 40% of your budget, while roofing takes another 20%. Knowing these proportions helps you allocate funds properly and avoid cost overruns.
Typical budget allocation for 3 bedroom house:
| Construction Phase | Percentage of Budget | Typical Cost Range |
|---|---|---|
| Site preparation & foundation | 25% | Ksh 400K – 600K |
| Walls & roofing | 35% | Ksh 700K – 1.2M |
| Electrical & plumbing | 15% | Ksh 300K – 500K |
| Finishing (floors, paint, fixtures) | 20% | Ksh 400K – 700K |
| Contingency | 5% | Ksh 100K – 200K |
Timeline matters as much as budget. A typical 3 bedroom modern house takes 4-6 months to complete with steady progress. Weather delays, material availability, and contractor scheduling all affect timing. Planning for these variables prevents cost escalation due to extended construction periods.
Professional contractors provide detailed timelines and budget breakdowns before work begins. This transparency helps you plan financing and avoid unpleasant surprises. The most successful projects I’ve seen had clear budgets and realistic timelines from day one.

low budget modern 3 bedroom house design
Many families exceed their budgets by making predictable mistakes during construction. Changing plans mid-construction costs more than getting designs right initially. Buying expensive materials for areas guests won’t see wastes money that could go toward visible improvements.
Top budget-busting mistakes:
The biggest mistake I see is treating construction like a shopping trip where you can change your mind freely. Every change order costs extra money and extends completion time. Get your design finalized before construction begins, then stick to the plan unless absolutely necessary.
Another common error is trying to save money by skipping professional services. Poor electrical or plumbing work costs more to fix than doing it right initially. Professional contractors might charge more upfront but prevent expensive problems later. Their experience helps you avoid costly mistakes that inexperienced builders make regularly.
Quality control during construction prevents small problems from becoming expensive disasters. Regular site visits, material inspections, and progress reviews keep projects on track and within budget. The families who stay most involved in their construction process usually achieve the best results for their money.
low budget modern 3 bedroom house design
What’s the minimum budget for a modern 3 bedroom house in Kenya? You can build a basic but attractive modern 3 bedroom house for around Ksh 1.8M to 2.5M, depending on location and material choices. This includes foundation, structure, roofing, basic finishes, electrical, and plumbing work.
How long does it take to build a 3 bedroom house? A typical 3 bedroom modern house takes 4-6 months to complete with steady progress. This timeline assumes good weather, material availability, and experienced contractors working consistently.
Can I build a modern house without an architect? While possible, hiring a qualified architect or designer ensures your house meets building codes and maximizes your budget. Professional designs prevent costly mistakes and create more functional spaces.
What’s the most cost-effective roofing option for modern houses? Flat roofs with proper waterproofing cost less than pitched roofs and create contemporary appeal. Iron sheets on simple pitched roofs also work well for budget-conscious modern designs.
Should I use concrete blocks or stones for walls? Concrete blocks cost 20-25% less than stones and provide excellent insulation. Once properly plastered and painted, concrete block walls look identical to stone walls but save significant money.
How can I reduce construction costs without compromising quality? Focus on efficient space planning, use local materials, choose simple architectural details, and work with experienced contractors. Avoid frequent design changes and over-specifying hidden elements.
What permits do I need for building a 3 bedroom house? You’ll need building permits from your local county government, plus approvals for electrical and plumbing connections. Professional contractors typically handle permit applications as part of their services.
Is it cheaper to build or buy an existing house? Building allows you to customize design and often costs less than buying equivalent new construction. However, buying existing houses might be faster and involve less risk if you find suitable options.
| Category | Price Range (KSh) | Capacity | Best For |
|---|---|---|---|
| Small Household Solar Dryer (2x1m) | 25,000 – 45,000 | 10-30 kg | Individual farmers, home use |
| Medium Solar Dryer (4x2m) | 65,000 – 95,000 | 50-80 kg | Small groups, cooperatives |
| Large Solar Dryer (4x6m) | 120,000 – 180,000 | 100-200 kg | Community projects, schools |
| Natural Solar Dryer with Cyclone | 85,000 – 130,000 | 80-150 kg | Improved efficiency designs |
| Installation & Transport | 15,000 – 35,000 | Varies | Depends on location |
solar dryer prices

Solar dryer prices in Kenya vary significantly based on size, design complexity, and materials used. I’ve been working with agricultural communities across Kenya for over 8 years, and I’ve seen how proper pricing knowledge can make or break a farming project. The most common mistake farmers make is choosing the cheapest option without considering long-term durability and capacity needs.
Most Kenyan suppliers offer three main categories. Small household units typically cost between KSh 25,000 to 45,000, medium-sized community dryers range from KSh 65,000 to 95,000, while large institutional models can reach KSh 180,000. These prices include basic materials but often exclude installation and transportation costs.
K&H Contractors has become a leading provider of solar dryer solutions across Kenya, particularly in northern regions like Marsabit County. Their pricing reflects the quality of materials and expert installation services that ensure optimal performance.
The price differences aren’t just about size. Direct solar dryers cost less than indirect models, but indirect systems preserve nutrients better in sensitive crops like herbs and vegetables. Hybrid systems with backup heating cost 30-40% more but provide year-round drying capability even during cloudy seasons.
solar dryer prices

Small household solar dryers measuring 2×1 meters represent the most affordable entry point for individual farmers. Prices typically range from KSh 25,000 to 45,000 depending on construction quality and materials used. These units can handle 10-30 kilograms of produce per batch, making them perfect for small-scale farming operations.
I’ve installed dozens of these units for smallholder farmers in Central Kenya. The most successful installations use UV-treated polycarbonate sheeting rather than cheap polyethylene. While this increases the initial cost by about KSh 8,000, the durability improvement is substantial – lasting 5-7 years compared to 2-3 years for cheaper materials.
Basic household models include a wooden frame, transparent cover, mesh drying trays, and ventilation system. Optional extras like thermometers add KSh 3,000-5,000 but provide valuable monitoring capabilities. Many farmers find these monitoring tools essential for achieving consistent drying results with high-value crops like herbs or dried fruits.
The return on investment for household units is impressive. A typical unit processing 20kg of mangoes weekly during harvest season can generate KSh 15,000-25,000 additional income monthly compared to selling fresh produce. This means most farmers recover their investment within 6-8 months of proper use.
solar dryer prices

Medium-scale solar dryers, typically measuring 4×2 meters, serve farmer groups and small cooperatives effectively. These units cost between KSh 65,000 and 95,000, offering capacity for 50-80 kilograms per drying cycle. The increased size provides better economics for groups processing larger volumes of agricultural products.
These community-sized units often feature improved designs with better air circulation systems. Many include separate solar air collectors that heat incoming air before it reaches the drying chamber. This indirect heating method prevents overheating while maintaining consistent temperatures throughout the drying process.
Construction materials for medium-scale units require more robust framing, often using metal instead of wood. The additional cost is justified by improved durability and weather resistance. I’ve seen wooden frames deteriorate quickly in coastal areas due to humidity, while properly galvanized metal frames last 10-15 years with minimal maintenance.
Installation complexity increases with size, typically requiring 2-3 skilled technicians for proper assembly. Professional installation adds KSh 12,000-18,000 to the total cost but ensures optimal performance and warranty coverage. Many suppliers offer training packages that teach community members basic maintenance procedures.

solar dryer prices
Large institutional solar dryers measuring 4×6 meters or larger represent significant investments ranging from KSh 120,000 to 180,000. These units suit schools, processing centers, and major agricultural cooperatives handling 100-200 kilograms per batch. The substantial capacity justifies the higher initial cost through increased processing efficiency.
I recently supervised installation of a 4×6 meter unit at Lbarok Primary School in Marsabit County. The project cost KSh 145,000 including installation and training. This unit processes school feeding program vegetables and generates income through community services. The school now earns KSh 8,000-12,000 monthly from drying services for local farmers.
Large units often incorporate advanced features like multiple drying chambers, temperature monitoring systems, and backup heating capabilities. These additions increase costs but provide professional-grade performance suitable for commercial operations. Many institutional buyers choose hybrid systems that combine solar heating with biomass or electric backup heating.
Transportation and installation costs increase significantly for large units. Remote locations can add KSh 25,000-35,000 to the total project cost due to logistics challenges. However, the processing capacity often supports entire communities, making the investment economically viable for group purchases or development projects.
solar dryer prices

Natural solar dryers with cyclone systems represent an innovative design that improves drying efficiency through enhanced air circulation. These systems cost KSh 85,000 to 130,000 depending on size and complexity. The cyclone component creates better airflow patterns that reduce drying time and improve product quality.
The cyclone system works by creating a vortex effect that pulls moisture-laden air from the drying chamber more effectively than traditional ventilation. This design innovation reduces drying time by 20-30% compared to standard solar dryers. For commercial operators, this efficiency improvement justifies the additional cost through increased throughput.
I’ve observed significant quality improvements in products dried using cyclone systems. Vegetables maintain better color retention, while fruits develop more uniform texture. This quality advantage translates to higher market prices – often 15-25% above products from conventional dryers. Many commercial processors specifically request cyclone-equipped units for this reason.
Installation requires additional technical expertise due to the cyclone component’s complexity. Professional installation is essential and typically costs KSh 18,000-25,000. However, the improved performance and durability make this investment worthwhile for serious agricultural processing operations.
solar dryer prices

Solar dryer prices vary significantly across different regions of Kenya due to transportation costs, local demand, and supplier availability. Northern regions like Marsabit and Turkana typically see 15-25% higher prices compared to Central Kenya due to logistics challenges. Remote locations require specialized transportation that increases overall project costs.
Coastal areas present unique challenges that affect pricing. High humidity and salt air require corrosion-resistant materials that increase costs by 10-20%. Stainless steel components and marine-grade finishes become necessary for longevity. Many coastal installations require frequent maintenance, adding to lifetime ownership costs.
Urban areas around Nairobi and Mombasa offer competitive pricing due to multiple supplier options and reduced transportation costs. However, installation space limitations in urban settings sometimes require custom designs that increase costs. Rural areas with good road access typically offer the best balance of competitive pricing and adequate installation space.
Seasonal demand fluctuations also affect pricing. Peak agricultural seasons (March-May and October-December) see increased demand that can raise prices by 5-15%. Smart buyers often purchase during off-peak periods and schedule installation for optimal timing. Many suppliers offer payment plans that help farmers manage cash flow challenges.
solar dryer prices

Professional installation costs typically range from KSh 15,000 to 35,000 depending on system size and location complexity. This investment ensures proper assembly, optimal positioning, and warranty coverage. I always recommend professional installation because improper assembly can reduce efficiency by 30-50% and void manufacturer warranties.
Installation includes site preparation, foundation work, assembly, and initial testing. Most installations require 2-3 days for completion including curing time for concrete foundations. Site accessibility affects costs significantly – locations requiring manual material transport can double installation expenses. Good road access keeps costs reasonable.
Maintenance requirements are minimal but important for longevity. Annual maintenance costs typically run KSh 2,000-5,000 for cleaning, seal replacement, and hinge lubrication. Major component replacement every 5-7 years adds KSh 8,000-15,000 depending on system size. Proper maintenance extends system life to 15-20 years.
Training programs offered by quality suppliers like K&H Contractors teach users proper operation and basic maintenance procedures. This training typically costs KSh 3,000-5,000 but significantly reduces long-term maintenance costs. Well-trained operators achieve better drying results and fewer equipment problems.

Many Kenyan financial institutions now offer agricultural equipment financing for solar dryers. Cooperative banks and microfinance institutions provide loans covering 70-90% of system costs with repayment periods of 2-5 years. Interest rates typically range from 12-18% annually, making financing accessible for serious agricultural ventures.
Group purchasing through farmer cooperatives often reduces individual costs by 15-25% through bulk discounts. Many development organizations and NGOs provide partial funding for community solar dryer projects. These partnerships can reduce individual farmer contributions to 30-50% of total system costs while providing technical support and training.
Return on investment calculations show impressive results for properly utilized systems. Small household units typically recover costs within 8-12 months through reduced post-harvest losses and value addition. Community systems serving multiple farmers often achieve payback periods of 12-18 months through service fees and improved product quality.
Value addition opportunities multiply investment returns significantly. Dried mangoes sell for 3-4 times the price of fresh fruit, while processed vegetables command premium prices in urban markets. Many successful operators report 200-300% returns on investment within three years of proper system utilization.
Q: What’s the cheapest solar dryer option available in Kenya? A: Basic household units start around KSh 25,000, but I recommend budgeting KSh 35,000-40,000 for quality materials that last longer and perform better.
Q: Do solar dryer prices include installation and training? A: Most quoted prices exclude installation (KSh 15,000-35,000) and training (KSh 3,000-5,000). Always confirm what’s included before purchasing.
Q: How long do solar dryers last in Kenyan conditions? A: Quality units with proper maintenance last 15-20 years. Cheap units may require replacement after 3-5 years, making them more expensive long-term.
Q: Can I build my own solar dryer to save money? A: DIY construction can save 30-40% on material costs, but requires technical skills and often results in poor performance. Professional designs ensure optimal results.
Q: What financing options exist for solar dryer purchases? A: Agricultural banks, cooperatives, and microfinance institutions offer equipment loans. Many development projects provide partial funding for community installations.
Q: Which crops provide the best return on investment? A: High-value crops like herbs, spices, and fruits offer the best returns. Mangoes, moringa, and indigenous vegetables typically provide 200-400% markup over fresh sales.
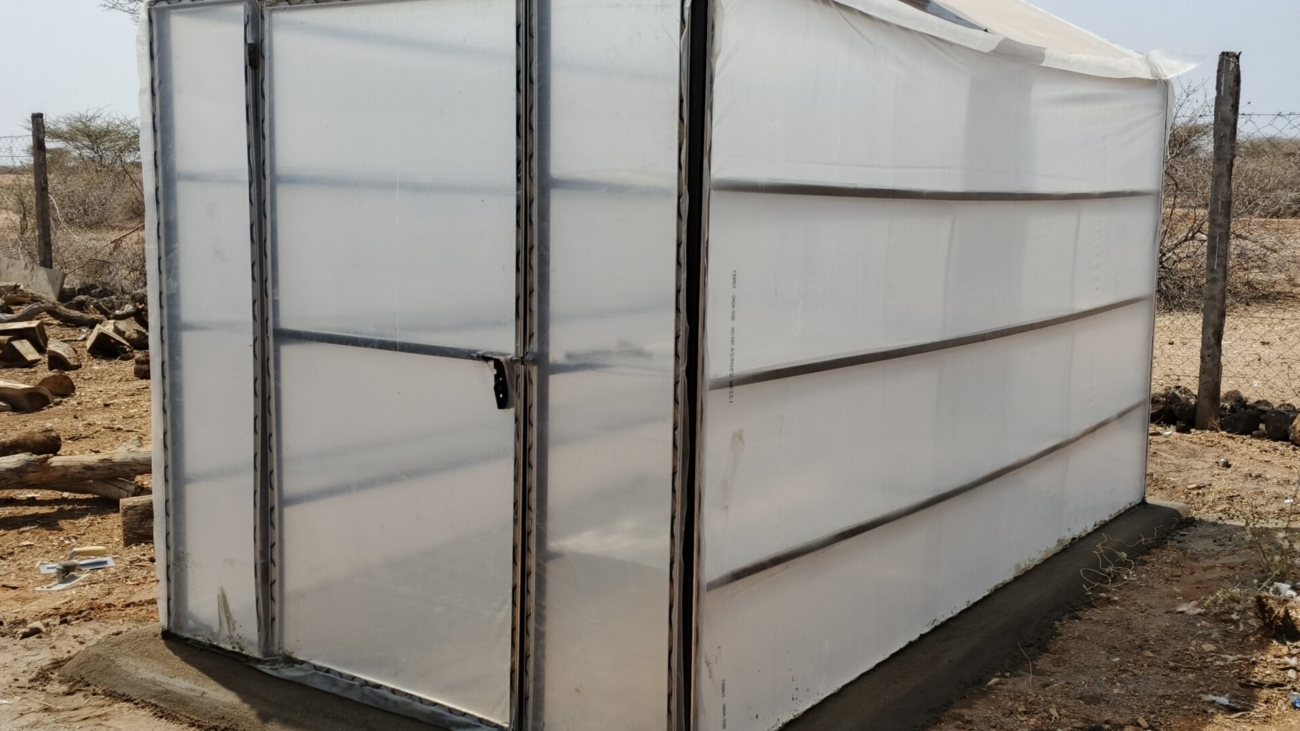
A vertical garden is a growing system that uses vertical space instead of horizontal ground area. Think of it as farming upwards rather than outwards. These systems stack plants in layers, creating a tower-like structure that maximizes food production in minimal space.

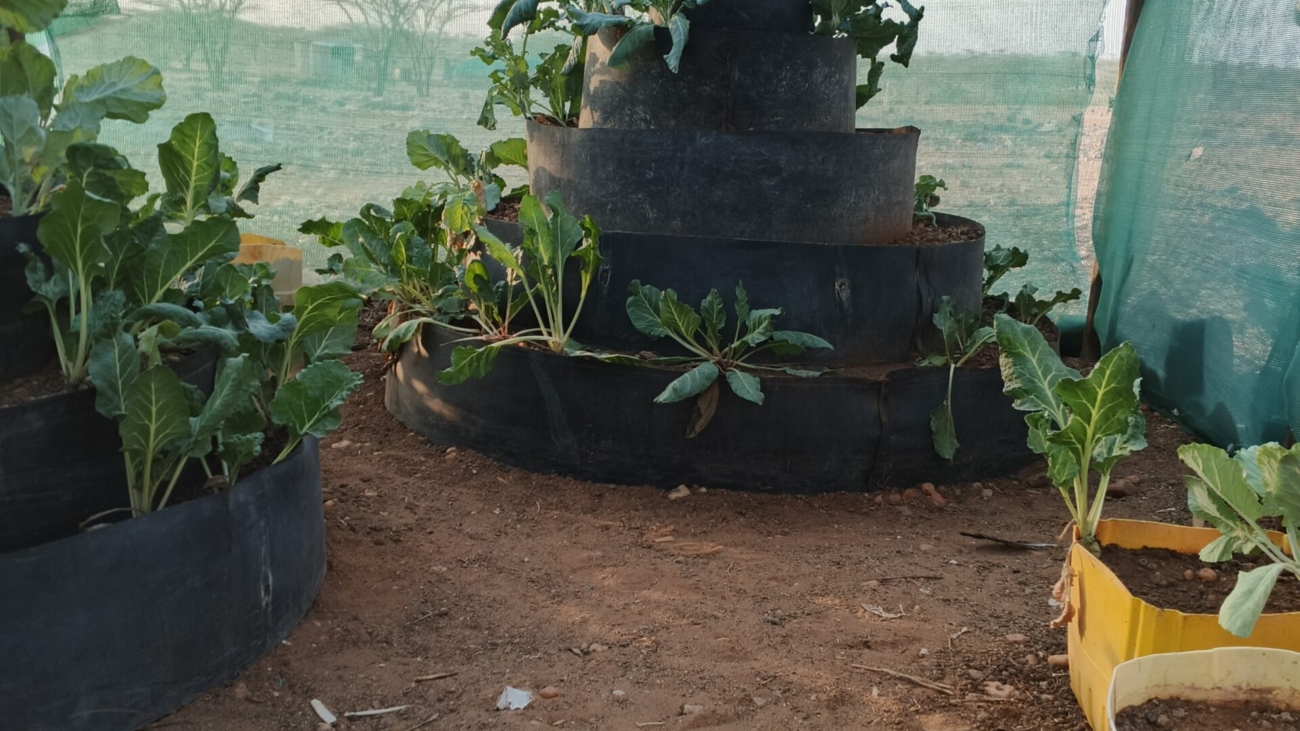
In Kenya, vertical gardens have become particularly popular due to land scarcity and water shortages. The cone-shaped design mimics a pyramid, with the widest section at the bottom and narrowing as it goes up. This structure allows multiple crop varieties to grow simultaneously while using minimal water and space.
The beauty of vertical gardens lies in their simplicity. You don’t need expensive equipment or years of farming experience. A basic setup can be constructed using everyday materials like plastic containers, polythene sheets, and soil mixed with organic matter. The system works by concentrating nutrients and water in a controlled environment, which leads to faster growth and higher yields compared to traditional flat gardens.
Many Kenyan farmers have discovered that vertical gardens produce vegetables continuously throughout the year. Unlike seasonal farming, these systems provide a steady supply of fresh produce regardless of weather conditions. The elevated design also protects crops from ground pests and reduces the risk of soil-borne diseases.
Space conservation stands out as the primary advantage of vertical gardens. A single cone garden measuring just 2 meters in diameter can produce the same amount of vegetables as a traditional plot measuring 10 square meters. This efficiency makes vertical gardens ideal for urban dwellers with limited compound space.
Water conservation is another critical benefit, especially in arid regions like Turkana and Marsabit counties. Traditional gardens can lose up to 70% of water through evaporation and runoff. Vertical gardens use drip irrigation systems that deliver water directly to plant roots, reducing waste by up to 90%. This efficiency is crucial during Kenya’s frequent drought periods.

The financial benefits are substantial. A well-managed vertical garden can generate income of KES 5,000-15,000 per month from vegetable sales. Initial setup costs range from KES 2,000-8,000, making the return on investment attractive for small-scale farmers. Many women in rural areas have used vertical gardens to start successful vegetable businesses.
Nutritional benefits cannot be overlooked. Vertical gardens provide fresh vegetables year-round, helping families combat malnutrition. Children in households with vertical gardens show improved health outcomes due to consistent access to leafy greens and other nutritious vegetables. The convenience of harvesting vegetables just steps from your kitchen encourages regular consumption.
Leafy greens perform exceptionally well in vertical garden systems. Kale, spinach, lettuce, and Swiss chard adapt perfectly to the cone structure. These crops have shallow root systems that don’t compete aggressively for space. They also mature quickly, allowing for multiple harvests throughout the year.
Herbs thrive in vertical gardens and provide excellent economic returns. Coriander, parsley, mint, and basil grow rapidly and command high prices in urban markets. A single cone garden can produce enough herbs to supply local restaurants or markets, creating a steady income stream.
Root vegetables like carrots, radishes, and beetroot work well in the lower, wider sections of cone gardens. These crops need more soil depth, so they’re typically planted in the bottom layers where containers are larger. The sandy soil mix used in vertical gardens provides excellent drainage for root development.

Climbing vegetables like tomatoes, beans, and peas can be incorporated using support structures. These plants are usually placed on the outer edges of the cone where they have room to spread. Cherry tomatoes work particularly well because they’re compact and produce continuously.
Avoid plants with extensive root systems like pumpkins or watermelons. These crops require too much space and can destabilize the cone structure. Also skip plants that need deep soil like fruit trees or large shrubs.
Site selection is crucial for vertical garden success. Choose a location that receives at least 6 hours of direct sunlight daily. The area should be level and well-drained to prevent waterlogging. Consider proximity to your water source, as you’ll need regular access for irrigation.
Gather your materials before starting construction. You’ll need containers of varying sizes (large buckets, medium pots, and small containers), polythene sheets or dam liner, quality soil, well-rotted manure, and basic tools like a spade and watering can. KNH Contractors offers complete vertical garden kits that include all necessary components.
Start by preparing your soil mixture. Combine equal parts of garden soil and well-rotted manure. This 1:1 ratio provides optimal nutrition for vegetable growth. Add a small amount of sand to improve drainage if your soil is heavy clay. The mixture should feel crumbly and hold together when squeezed.

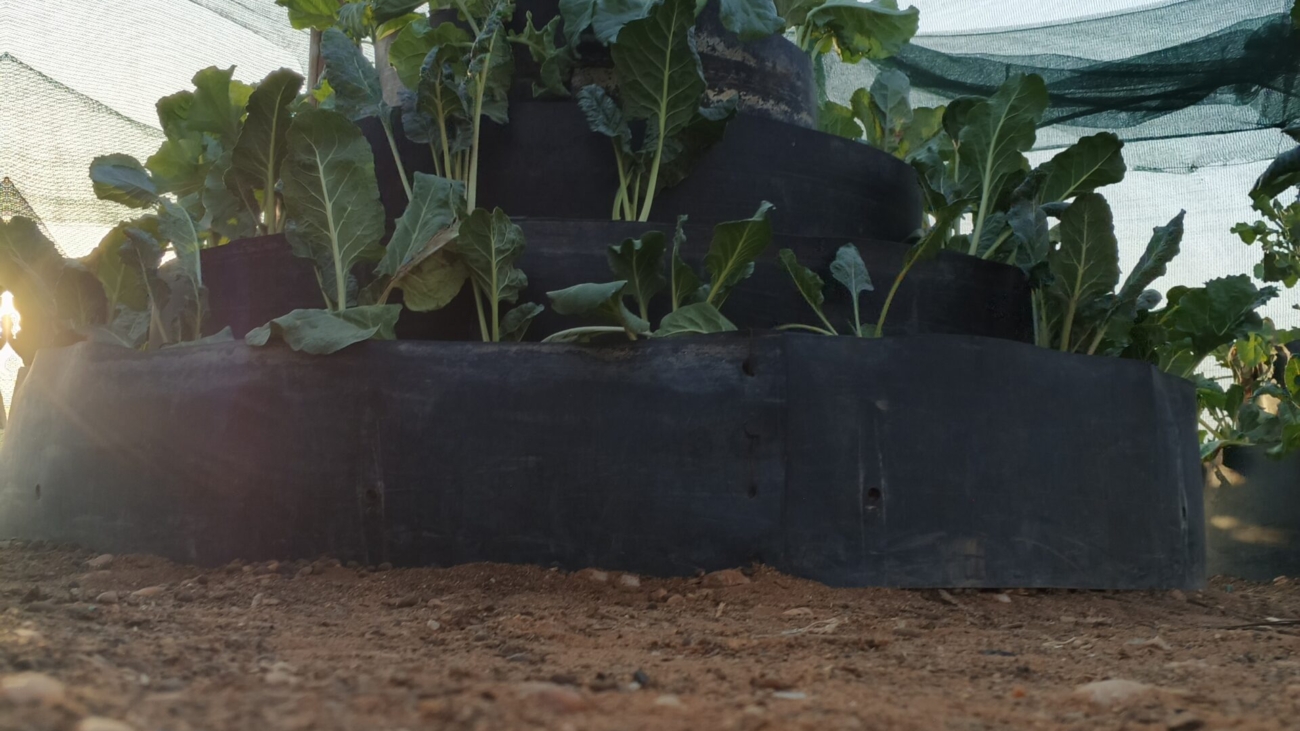
Construct your cone by placing the largest container at the bottom, then stacking progressively smaller containers on top. Each layer should be offset slightly to create the cone shape. Fill containers with your soil mixture, leaving about 2cm from the rim for watering space.
Allow the soil to settle for 24-48 hours before planting. This settling prevents soil from compacting around new seedlings. Water the entire structure thoroughly to identify any drainage issues before adding plants.
Drip irrigation provides the most efficient watering method for vertical gardens. Install a main water line at the top of the cone, then branch smaller tubes to each planting level. Perforated pipes or drip emitters deliver water slowly and evenly to each plant.
For areas without reliable water supply, consider installing a borehole drilling system to ensure consistent irrigation. Professional borehole drilling services can assess your property and recommend the best water source options.
Manual watering works for smaller vertical gardens but requires more time and attention. Use a watering can with a fine nozzle to avoid disturbing soil or damaging delicate seedlings. Water early morning or late evening to minimize evaporation losses.

Monitor soil moisture by inserting your finger 2-3cm into the soil. If it feels dry at this depth, it’s time to water. Vertical gardens typically need watering every 2-3 days during dry seasons and less frequently during rainy periods.
Consider rainwater harvesting to supplement your irrigation system. Install gutters and collection tanks to capture rainfall from rooftops. This free water source reduces irrigation costs and provides chemical-free water for your vegetables.
The pyramid tower design offers maximum growing space in minimal area. Start with a large container (60cm diameter) at the base, then stack containers of decreasing size: 50cm, 40cm, 30cm, and 20cm diameter. This creates a stable, cone-shaped structure that can hold 50-80 plants.
KNH Contractors provides pre-made pyramid tower kits that eliminate construction guesswork. These professional systems include properly sized containers, irrigation components, and detailed setup instructions. The investment typically pays for itself within 3-4 months through vegetable sales.
Fill each level with your prepared soil mixture, starting from the bottom. Pack soil firmly but not too tightly – roots need space to grow and water needs to drain properly. Leave drainage holes uncovered to prevent waterlogging.

Install your irrigation system before planting. Run the main water line up the center of the pyramid, then branch out to each level. Test the system thoroughly to ensure even water distribution to all plants.
Plant your vegetables starting from the top and working downward. Place smaller, lighter plants like herbs and lettuce on upper levels. Position larger plants like kale and spinach on lower levels where they have more soil volume and stability.
Transplant seedlings when they’re 4-6 weeks old and have developed strong root systems. Plant during cooler parts of the day (early morning or evening) to reduce transplant shock. Space plants according to their mature size – overcrowding leads to poor growth and increased pest problems.
Fertilize regularly with liquid organic fertilizer made from compost tea or fish emulsion. Apply every 2 weeks during active growing seasons. The concentrated growing environment of vertical gardens means nutrients are depleted more quickly than in traditional gardens.
Prune plants regularly to maintain shape and encourage bushy growth. Remove yellowing leaves and spent flowers to redirect energy into new growth. This maintenance keeps plants productive and prevents disease spread.

Monitor for pests and diseases weekly. Common problems include aphids, whiteflies, and fungal infections. Early detection allows for organic treatment methods like neem oil or insecticidal soap. Good air circulation around plants helps prevent many disease issues.
Harvest vegetables at peak ripeness for best flavor and nutrition. Regular harvesting encourages continued production. Many leafy greens can be harvested multiple times by cutting outer leaves and allowing the center to continue growing.
Yellowing leaves often indicate overwatering or poor drainage. Check that drainage holes aren’t blocked and reduce watering frequency. Improve soil drainage by adding more sand or perlite to your mixture.
Stunted growth usually results from insufficient nutrients or poor soil quality. Apply liquid fertilizer more frequently and consider adding fresh compost to planting areas. Soil testing can identify specific nutrient deficiencies.
Pest infestations spread quickly in vertical gardens due to plant proximity. Inspect plants daily and remove affected leaves immediately. Introduce beneficial insects like ladybugs to control aphid populations naturally.

Uneven water distribution creates dry spots and overwatered areas. Adjust your irrigation system to ensure all plants receive adequate moisture. Consider installing additional drip emitters in areas that dry out quickly.
Structural instability occurs when soil becomes too heavy or containers aren’t properly secured. Ensure adequate drainage to prevent soil from becoming waterlogged. Use appropriate container materials that won’t crack under soil weight.
What is a vertical garden? A vertical garden is a space-saving growing system that stacks plants in layers, creating a tower-like structure. It maximizes food production in minimal space while using less water than traditional gardens.
What plants grow well in vertical gardens? Leafy greens (kale, spinach, lettuce), herbs (coriander, parsley, mint), root vegetables (carrots, radishes), and climbing plants (beans, cherry tomatoes) all perform excellently in vertical garden systems.
How to start a vertical garden? Begin by selecting a sunny location, gathering materials (containers, soil, manure), preparing soil mixture, constructing the cone structure, installing irrigation, and transplanting seedlings.
How to water a vertical garden? Use drip irrigation systems for best results, or water manually with a fine-nozzle watering can. Water every 2-3 days during dry seasons, checking soil moisture 2-3cm deep.
How to install an artificial vertical garden? Purchase pre-made artificial plants and mounting systems. Install wall brackets, attach growing medium, and arrange plants according to manufacturer instructions. No watering or maintenance required.
How to make a vertical vegetable garden? Stack containers of decreasing size, fill with soil-manure mixture, install irrigation system, and plant vegetables according to their space requirements. Maintain through regular watering and harvesting.
What to plant in a vertical garden? Choose compact, fast-growing vegetables like lettuce, spinach, herbs, radishes, and cherry tomatoes. Avoid large plants with extensive root systems like pumpkins or fruit trees.
How to build a vertical garden pyramid tower? Stack containers from largest (60cm) to smallest (20cm) diameter, fill with prepared soil mixture, install irrigation system, and plant vegetables starting from the top level.
How to plant a vertical garden? Transplant 4-6 week old seedlings during cooler parts of the day. Space plants appropriately, place smaller plants on upper levels, and larger plants on lower levels for stability.
How to grow a vertical garden? Maintain consistent watering, fertilize every 2 weeks, prune regularly, monitor for pests, and harvest vegetables at peak ripeness to encourage continued production.
What plants can grow in a vertical garden? Almost any compact vegetable can grow vertically, including all leafy greens, most herbs, root vegetables, and climbing plants with proper support structures.
What grows well in a vertical garden? Fast-growing, compact vegetables perform best. Leafy greens, herbs, and root vegetables adapt excellently to vertical growing conditions and provide continuous harvests.
For professional vertical garden installation and comprehensive agricultural services, contact KNH Contractors today.
What is a Cone Garden?
A space-savvy gardening system that uses a cone-shaped structure for growing multiple layers of crops.
Benefits of Cone Gardens:
Saves water, increases nutrient efficiency, and fits in small spaces.
How do cone gardens work?
Uses vertical stacking with drip irrigation to conserve water and concentrate nutrients.
Who can benefit from cone gardens?
Urban farmers, households with limited space, and communities facing drought.
Easy to Build:
Step-by-step methods make it accessible even for beginners.
Community Impact:
Helps improve nutrition and supports economic empowerment.
Why would someone wanna try a cone garden? Hmmm, let’s talk about it. Cone gardens are these innovative setups that help ya maximize your growing area by stackin soil in a cone shape. They be super handy in small spaces and are especially cool for folks in areas where water is scarce. Do you wonder how they work? It’s pretty simple – the design allows for layers of crops, so you can grow more in less space.
What makes them stand out? Their cone shape helps concentrate water and nutrients right where the plants need ’em most. This is useful for regions like parts of Kenya that face drought. Do you know what else is neat? The design keeps things organized and minimizes bending over, which is great for folks who might find that hard.
Have ya ever seen a garden that uses vertical stacking? It’s not your regular flat garden bed. Instead, the cone garden stacks soil upward, allowing plants to have their own layer. This way, the nutrients don’t get too spread out. And ya might be askin, “How does this benefit urban farmers?” The answer is, it gives them a way to grow more crops in a small area, which is a big plus in city spaces.
I always find it interesting that even with a simple idea like this, the design can really change how much you can grow. For more on innovative approaches in construction and resource use, check out KNH Contractors. This system is not only smart but also practical, especially when every drop of water counts.
Did ya ever think of combining modern techniques with traditional gardening? Well, cone gardens do just that by adapting old ideas to new challenges. Every little detail, from the structure to the materials used, is designed to help plants thrive even when space and water are in short supply.
Ever wondered what holds a cone garden together? Let’s chew on that. The cone garden gets its name from the shape, kinda like an ice cream cone but for plants. The soil forms a cone above the ground, and this layout helps create layers for different crops. So, why is the structure so important? It keeps the nutrients concentrated, helping plants to grow better.
Which materials are best for this design? The common ones are polythene sheets, recycled paper, or various containers that can hold soil in place. They might not be fancy, but they do the job well. If you ask me, it’s all about using what’s around ya and making it work. Do you think a recycled paper might be too flimsy? Not really – when arranged properly, it holds the shape just fine.
Have ya seen how the layers get built? Each layer is filled with soil mixed with manure to keep the plants fed. The cone shape naturally guides the soil to settle in a stable structure. I mean, it might look a bit odd at first, but its function is solid. For instance, check out Contact KNH Contractors to learn about other practical constructions that use similar smart techniques.
What about durability? The materials used aren’t always expensive, but they sure are effective. The design focuses on efficiency rather than flashy looks. So, if ya wonder how this design saves resources, it’s because every part of the structure is optimized for growth and minimal waste.
Here’s a simple table to sum up the materials and their benefits:
| Material | Benefit | Consideration |
|---|---|---|
| Polythene sheets | Holds soil together | Affordable |
| Recycled paper | Eco-friendly | Requires proper layering |
| Containers | Variety in sizes available | Easy to stack |
Do ya think these materials might be available everywhere? In many regions, yes, which makes the cone garden an adaptable solution. The design also helps in maintaining soil structure, ensuring that water doesn’t wash away the nutrients. It’s a clever mix of simple ideas with effective results.
Ever pondered how a cone garden saves water? Well, let’s ask and answer that right here. One of the best parts of a cone garden is how it uses drip irrigation. How does drip irrigation work? It delivers water right to the plant roots, which means there’s little wastage. This is especially vital in areas where water is scarce.
So, why use drip irrigation? The answer is clear: it makes sure that water goes exactly where it’s needed. Imagine if ya were watering a garden with a hose – a lot of water gets lost. Drip irrigation minimizes that by providing a slow, steady stream right at the base of each plant. This means you use less water while still keepin your plants happy.
Do ya know what else drip systems help with? They also keep the soil moist without oversaturating it, which helps in nutrient retention. When nutrients are concentrated near the roots, plants can absorb them better. If you’re curious about efficient water use in other construction projects, check out Borehole Drilling in Kenya.
Here’s a quick list of benefits for drip irrigation in cone gardens:
Minimized Water Loss: Water is delivered directly to roots.
Improved Nutrient Absorption: Concentrated nutrients help crops grow strong.
Less Soil Erosion: The slow release prevents washing away soil.
Better Crop Yields: Efficient water use leads to healthier plants.
What about setting up the system? It involves installing a network of small pipes or perforated lines along the cone structure. The process might seem technical, but it’s really just about positioning the drip lines correctly. Once set up, the system runs automatically, saving you time and effort.
Did ya ever think that saving water could be this straightforward? The drip system ensures that every drop counts, making it a smart choice in regions with limited water supply. Plus, the simple design means maintenance is minimal. Every part of this setup works together to keep the garden efficient and productive.
Curious about what you can plant in a cone garden? Let’s chat ’bout that. Cone gardens allow for a wide range of crops because the conical shape creates multiple layers for planting. Ever wondered why layering is a big deal? It helps concentrate nutrients, so each plant gets enough food to thrive.

So, which crops work best here? The design suits a variety of vegetables like kale, spinach, carrots, coriander, black nightshade, and okra. Do ya see the benefit? Each crop can be planted on different layers according to its growth need. This also means you can have a mix of short and long-term crops all in one garden.
Here’s a quick bullet list:
Kale: Grows well on the upper layers.
Spinach: Thrives in the middle layers.
Carrots: Do better in the deeper, nutrient-rich layers.
Okra: Can be positioned where it gets balanced water and nutrients.
Wondering how nutrients stay in place? The cone shape naturally directs water and nutrients downward, ensuring they stay near the roots. This design minimizes losses, which is crucial when resources are limited. It’s a smart, natural way to boost plant growth.
I often ask myself, “How does this affect overall crop yield?” The answer is pretty neat: better nutrient concentration leads to higher productivity. When plants get the right mix of nutrients, they grow stronger and produce more. This is not just a theory; it’s been observed in areas like Turkana County, Kenya, where cone gardens have helped combat malnutrition.
If ya want to see more details on how smart setups help growth, check out Everything You Need to Know About Borehole Drilling. The idea here is simple yet effective: by diversifying crops and concentrating nutrients, cone gardens create a robust environment for plants to flourish. It’s all about using space wisely and keeping things balanced.
Ever wondered how to set up a cone garden yourself? Let’s break it down, step by step. Building a cone garden is less about fancy techniques and more about following simple instructions. First, ya gotta choose a sunny, well-drained spot. Is that clear? Yes, because plants need sun and proper drainage to grow.

What comes next? Layer construction. Start by arranging concentric containers or using polythene sheets to form the cone. Fill each layer with a soil-manure mix, usually in a 1:1 ratio, to ensure the plants get enough nutrients. Allow the soil to settle, then plant your selected crops according to their needs.
Here’s a simple ordered list for clarity:
Site Selection: Find a sunny, well-drained area.
Layer Construction: Build the cone using available containers or materials.
Soil Preparation: Mix soil with manure (1:1) and fill each layer.
Irrigation Setup: Install drip irrigation pipes for efficient watering.
Planting: Place crops in layers based on their growth requirements.
Do ya reckon maintenance is hard? Not really – once the garden is set up, regular checks to ensure the drip system is working and occasional soil replenishment will keep the system going strong. The design itself minimizes daily work since it reduces the need for bending and constant watering.
For a bit more on how structured projects work, you might want to visit Steps in Borehole Drilling. It’s all about simple, practical steps that anyone can follow. The process may seem a tad technical at first, but each step is manageable if taken slowly and with care.
What if ya run into trouble? Remember, a bit of trial and error is part of the process. Keep an eye on water flow, and don’t hesitate to adjust the layers if needed. This DIY project can turn into a fun way to get into gardening, especially in areas where space is at a premium. With a little effort and careful planning, you can have your very own cone garden thriving.
Ever ask, “How do cone gardens help communities?” It’s a simple idea with a big impact. Cone gardens are not just about growing food; they empower local communities by offering a sustainable way to produce nutritious vegetables. This system is especially helpful in areas with limited land and water, such as parts of Kenya.

Who benefits most? Women and urban farmers often find that cone gardens provide a practical solution that fits their space and resource limits. When ya ask, “Why is this important?” it’s because having a steady supply of fresh vegetables can improve nutrition and even boost local incomes. Small-scale farmers can sell extra produce, which helps in community development.
Let’s look at a few bullet points:
Food Security: Steady supply of fresh vegetables.
Economic Boost: Opportunities for local sales.
Ease of Use: Simple design makes it accessible.
Nutritional Benefits: Regular vegetable intake improves health.
Have ya ever seen how community projects can change lives? In Turkana County, for example, cone gardens have been a game changer. They not only improve nutrition but also provide a source of income for many families. When people get the chance to manage their own food supply, it builds confidence and skills.
For further insights into sustainable community projects, check out Borehole Casing. The idea is that by maximizing small spaces, communities can grow more food and reduce reliance on external sources. This local empowerment is vital for building resilience in challenging climates.
What about long-term benefits? Over time, these gardens can lead to improved local economies and better living conditions. It’s a cycle of self-sufficiency where small investments in a cone garden yield large returns in health and wealth. With minimal setup costs and the possibility of scaling up, cone gardens represent a smart, sustainable approach for many communities.
Got questions about the hurdles in cone gardening? Let’s get into it. Despite all the benefits, setting up a cone garden comes with its own set of challenges. One common concern is the initial setup, which can be time-consuming and may require some training. Have ya wondered, “Is it worth the hassle?” Well, for many, the long-term benefits outweigh the upfront effort.
What are the main hurdles? The setup cost and the need for proper maintenance are big ones. Sometimes, scaling up from a small household project to a community-wide initiative can be expensive compared to traditional farming. Do ya think that deters people? Not necessarily, if the long-term improvements in food security and nutrition are considered.
I often ask myself, “How do we balance cost with benefit?” The answer lies in efficient resource use. Even though the initial setup might be a bit heavy, once you have the garden running, the system pays for itself by reducing water and fertilizer waste. For more insights on resource management, take a look at Comprehensive Borehole Drilling Services in Kenya.
What advice do experts offer? Simple – start small, learn the process, and gradually expand. Personal experience has shown that a few trial runs can iron out most issues. I remember when I first set up a cone garden; it took a couple of tries to get the drip system right. But once I figured it out, the ease of maintenance made it all worthwhile.
Here’s a short list of expert tips:
Begin with a small setup: Test your design.
Focus on proper training: Understand the drip irrigation system.
Plan for scalability: Think ahead about costs.
Monitor regularly: Early detection of issues can save time.
Do ya reckon the future of cone gardening is bright? With continued innovation and support from community programs, the outlook seems promising. There is always room to improve, whether it’s using better materials or refining irrigation methods. The challenges are real, but the potential benefits for food security and economic empowerment are even greater. This balanced view, backed by hands-on experience, shows that while there are bumps along the road, the journey is worth it.


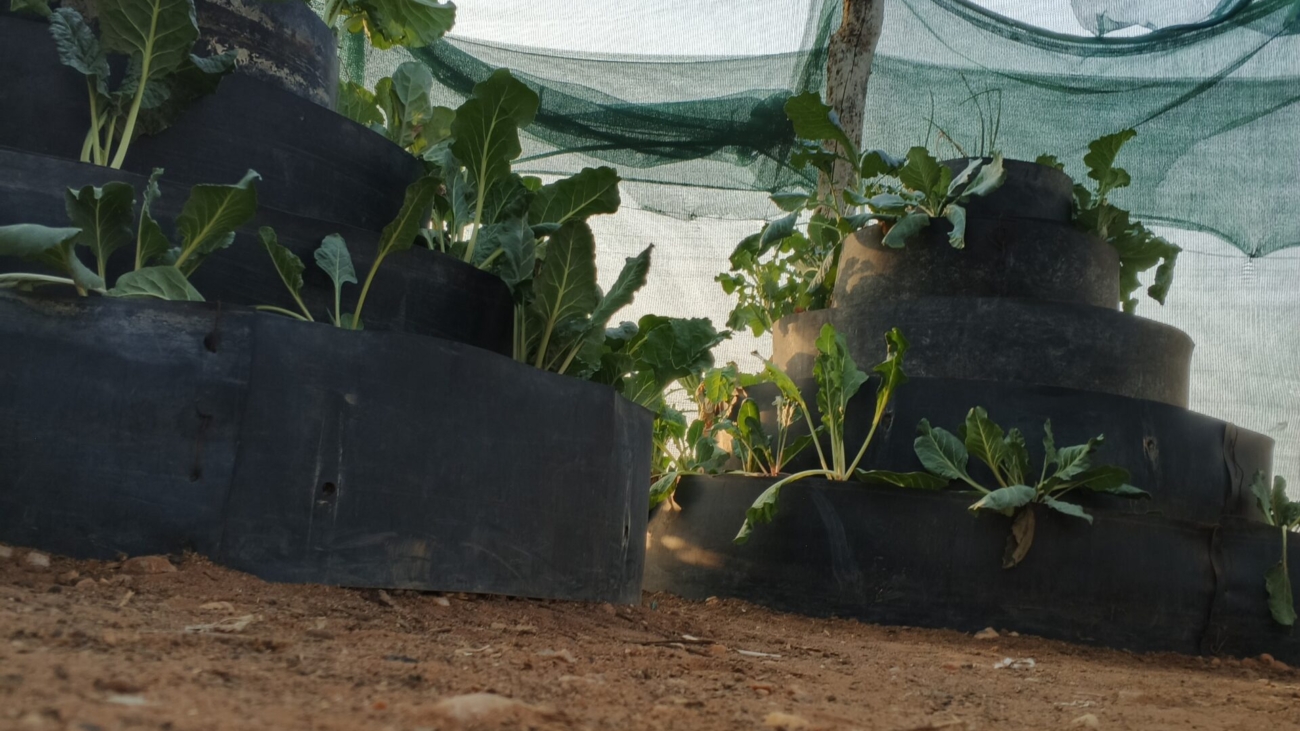
At Knight and Hammer (KNH) Contractors, we specialize in climate-smart agricultural solutions that maximize productivity in limited spaces. Our multi-storey gardens—a modern vertical farming system—are particularly popular among urban vegetable and herb growers in Kenya, offering an innovative way to grow more using less land and water.
Whether in residential backyards, balconies, or greenhouses, KNH’s multi-storey garden systems are designed for efficiency, sustainability, and ease of use, making them ideal for both subsistence farming and small-scale commercial ventures.
A multi-storey garden is a form of vertical farming that uses layered tiers to grow crops in upward levels instead of horizontally on the ground. These systems are ideal for kitchen gardens and urban farming where space is constrained. Common crops include:
Vegetables:
Kale, spinach, carrots, leeks, garlic, black nightshade, amaranth
Herbs and Spices:
Coriander, rosemary, lemongrass, citronella, mint
Fruits:
Strawberry
KNH Clients can choose to install multi-storey units in the open, within a greenhouse, or inside a shade house, depending on their crop type, climate control needs, or protection against pests and animals.
At KNH, we recommend HDPE dam liner as the structural base for our multi-storey gardens due to its durability and water retention properties.
Key Features:
6 vertical layers, including the base
Base circumference: 6 meters
Each layer reduces in circumference by 1 meter as it goes up
Height per layer: 0.2 meters (20 cm)
Built using 0.75mm or 1mm HDPE dam liner, which is bolted or welded for a secure hold
On a 2M x 2M area, a KNH multi-storey garden can support 180–250 plants, compared to:
Sack/shade net gardens: 100–150 plants
Traditional ground farming: 30–60 plants (same area, accounting for walking space)
This translates to a higher yield per square meter, conserving both land and water.
Our standard dam liner-based multi-storey garden starts at just KES 2,000 per unit.
Our vertical gardens can be irrigated using:
Pre-perforated rip lines
Button drippers
Recommended irrigation frequency: 2–3 times per week, depending on weather conditions.
Refer to the “How to make multi-storey gardens in Kenya” section above or request KNH installation and training services.
Approximately 6 square feet in base area.
Space-saving and water-efficient
Quick assembly and low maintenance
Supports a variety of vegetable and herb crops
Suitable for both open and controlled environments
Requires proper training for DIY setups
Not cost-effective for very large-scale commercial farms
Initial setup takes time compared to simple sack gardens
At Knight and Hammer, we bring innovation, experience, and reliability to urban and peri-urban agriculture. Our multi-storey garden systems help farmers and households grow more with less—less space, less water, and less hassle.
📞 Get in touch today to request a custom installation or quote.


Borehole drilling in Kenya is vital for regions where surface water is scarce. The cost to drill a borehole can vary due to several factors, including the depth of the borehole, location, and the technology used. For a standard borehole, you can expect to pay between KES 1,500,000 and KES 2,500,000, which roughly translates to KES 15,000,000 for larger projects like the Quone Borehole project.
Several factors influence the final cost of drilling a borehole:

Apart from the drilling itself, other costs include:

Drilling a borehole in Kenya requires environmental assessments to minimize potential negative effects such as:
However, boreholes also provide many positive environmental and economic benefits, such as improving water access for communities and enhancing agricultural productivity.
Ensuring the sustainability of a borehole involves addressing several challenges, including:

A typical borehole depth in Kenya ranges between 100 to 300 meters, depending on the geological conditions.
A well-maintained borehole can last 25 to 50 years.
The drilling process can take anywhere from 3 days to 2 weeks, depending on the depth and location.
Signs include reduced water yield, muddy or murky water, and abnormal noises from the pumping system.


